Cooling Coil Moisture Carryover: Causes and Prevention

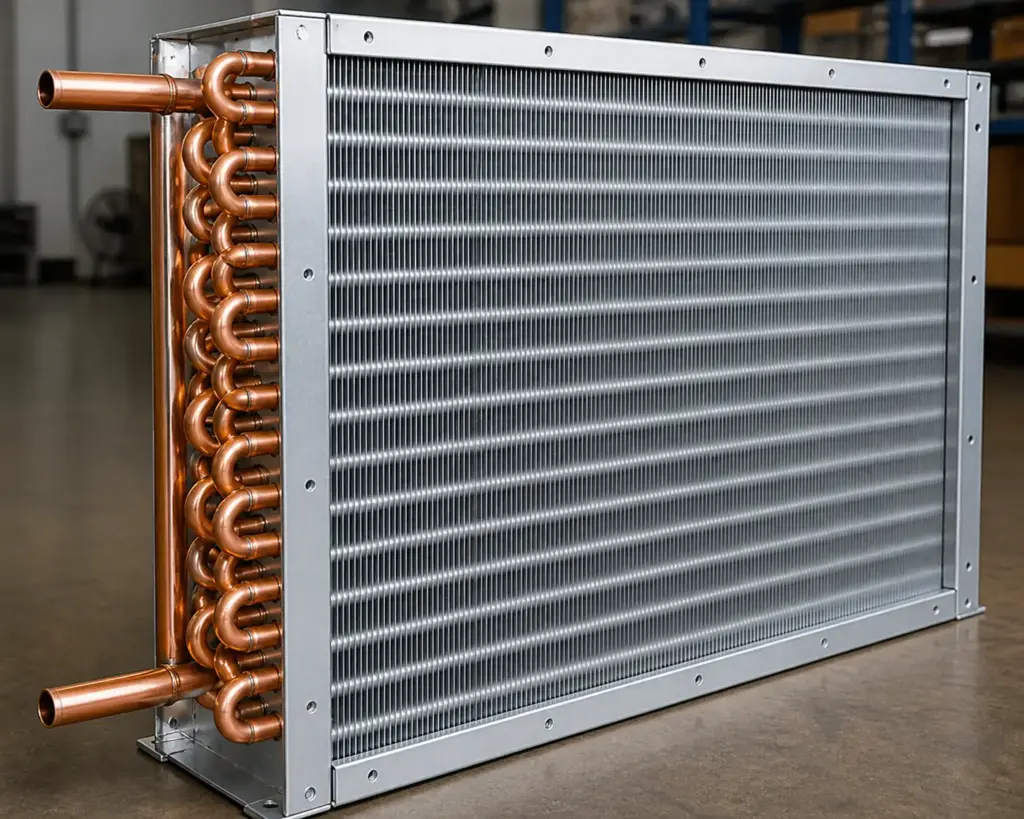
Cooling coil moisture carryover occurs when airflow pulls condensation from a chilled-water or DX coil into the air handler or ductwork. Common causes include excessive air velocity, tall coils, high humidity and inadequate drainage.

Keep Air Velocity Under Control

Cooling coil face velocity should generally remain below 500 to 550 feet per minute. Higher velocities can pull water from the coil before it reaches the drain pan resulting in moisture carryover.Moisture Carryover

Face velocity = Airflow (CFM) ÷ Coil face area (square feet)

Avoid Oversized Coil Heights

Capital Coil generally does not build chilled-water or DX evaporator coils taller than approximately 50 inches as a single section.

For a 96-inch-high application, we would typically build two 48-inch coils and stack them with an intermediate drain pan. This improves drainage while making the coils easier to ship, handle and install.

Account for Humidity

A coil handling humid outside air produces more condensation than one handling mostly return air. For example, 95°F dry-bulb and 78°F wet-bulb outside air in Florida contains considerably more moisture than typical return air in the Northeast.

Climate, outside-air percentage and entering-air conditions must be considered when sizing the coil and drain pan.

Fin Type Is Not the Solution

Copper, aluminum, corrugated, flat and spiral fins can all experience moisture carryover. Fin characteristics may affect how water behaves, but proper face velocity, coil height, air distribution and drainage are more important.

Check Airflow After Replacing a Coil

Old coils often become clogged with dirt and restrict airflow. A clean replacement coil may have less resistance, allowing airflow and face velocity to increase.

After installing a new cooling coil, verify:

  • System airflow and coil face velocity
  • Air distribution across the coil
  • Drain-pan size and slope
  • Condensate drain and trap design
  • Evidence of water downstream


SUMMARY


What is the most common cause of cooling coil moisture carryover?

Excessive air velocity through the coil is one of the most common causes. High face velocity can pull condensation from the fins before it reaches the drain pan.

Can a chilled-water coil cause moisture carryover?

Yes. Any chilled-water coil operating below the entering air’s dew point can produce condensation and experience moisture carryover.

Can a DX evaporator coil cause moisture carryover?

Yes. DX evaporator coils remove moisture while cooling the air and can experience carryover when airflow, coil height or drainage is unsuitable.

Need Help With a Replacement Cooling Coil?

Capital Coil & Air manufactures replacement chilled-water and DX evaporator coils for commercial HVAC systems. Contact us for help evaluating coil dimensions, airflow, configuration and drainage requirements.


RELATED POSTS

10 Things You Need to Know About Chilled Water Coils

Top 10 Chilled Water Coil Facts

Chilled Water Coil Circuiting Made Easy


Top 10 Tips For Measuring HVAC Coils
1. When measuring HVAC coils, performance has very little to do with accurately measuring for replacement coils. Fitting the coil in the existing space with the least amount of labor has everything to do with measuring a coil.  If you duplicate the coil in almost every respect, the performance will match and take care of itself.  New is always more efficient than old.

2.  If you’re ever in doubt about a dimension, smaller is always better than bigger. You can always “safe off” around any coil as long as you can fit it in the space.  If a coil is too big, it makes a really ugly coffee table in your shop.  Too big is the enemy of measuring coils.

Chilled Water Coil

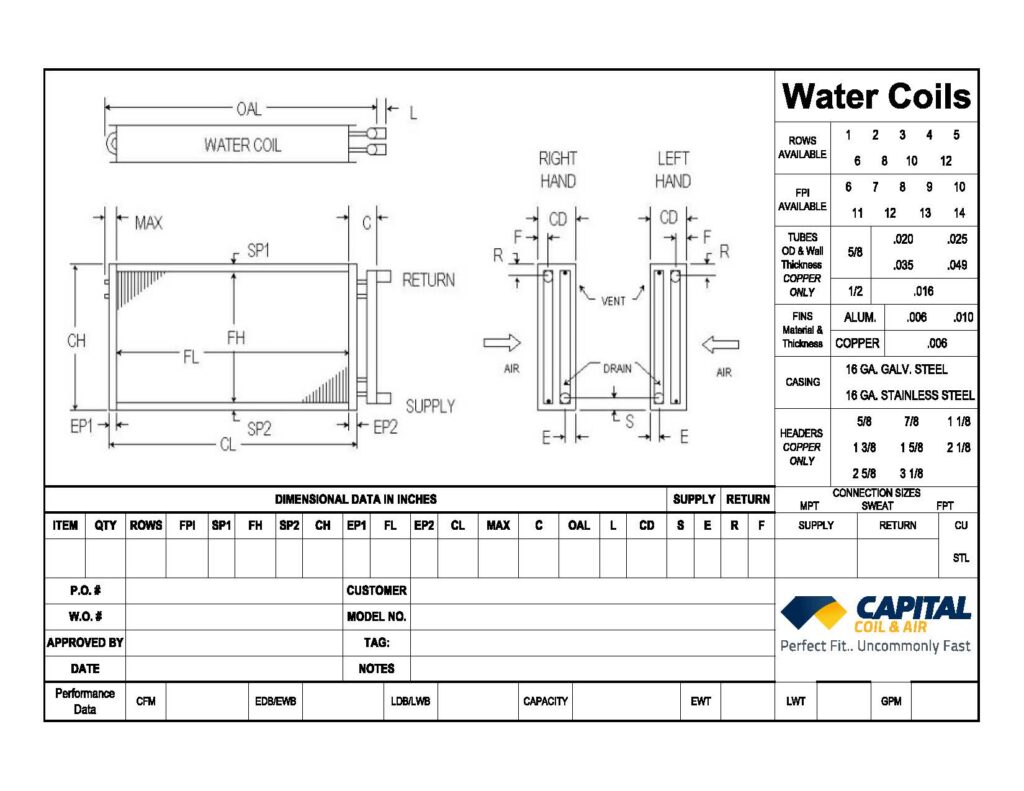
3.  The fin height and fin length are not the determining factors in measuring a coil. The overall casing dimensions are the most important, and you work backwards to determine fin dimensions.

4.  The depth of any coil is the total casing depth in the direction of airflow. The height is the number of tubes high in any row.  Depth is a function of rows deep and height is a function of tubes in a row.

5.  Overall length (OAL) is not the fin length and it’s not the casing length. It is the length from the return bends to include the headers that are inside the unit.  Again, it is necessary to work backwards to get the other dimensions once you know this critical dimension.

6.  Circuiting is the number of tubes connected to the supply header. Generally, you just want to count the number of tubes connected to the header and that will tell you whether it’s full, half, or even a double circuit.  It does not matter how the return bends are configured.  Your goal is to count the number of supply tubes and all performance is based on that.

7.  Fins are measured in fins per inch. Hold a tape measure up to the coils and count the number of fins in one inch.  If you can’t get in to take the measurement, a safe rule of thumb is 10-12 fins/inch.  That will work on almost every coil.  The exception to that rule is a condenser coil.  14-16 fins/inch on a condenser coil is usually pretty safe.

8.  Connection locations are difficult only if you are using the existing piping in the system (which are welded). Copper piping is brazed and can be changed easily.  If a system is old and the piping is being replaced as well as the coil, the connection location is not a major deal.  It’s very easy to match up!

9.  With replacement coils, the concept of “left hand vs. right hand” doesn’t actually exist. Connections are “top left-bottom right” or vice versa.  Ideally, all coils should be counter-flow which means that the water and air flow in opposite directions.  The air hits row one first and the water is piped into row eight first.  However, there are lots of installations that are piped backwards, and they work just fine.  Just match them up, and the coil’s performance will be equal to the old coil.

10.  Connections are not measured from the top of the header! They are measured from the top of the casing to the centerline of the connection.  Or the bottom of the casing to the centerline.  You need a point of reference, and the header height can be anything just as long as it doesn’t stick above or below the casing height.


All of the above “suggestions” or “secrets” are in no particular order.  They are just things that you should know to ensure that you are selecting the correct replacement coil. While most seem like common sense, your best bet is to talk with the sales team at Capital Coil & Air, who can walk your through the entire process and help you to fill out coil drawings when trying to measure the dimensions.

RELATED POSTS

Replacement HVAC Coils: 10 Common Ordering Mistakes

The Smart Approach to Buying HVAC Coils (and Saving Money)

Top 10 Chilled Water Coil Facts


How Data Centers Are Reshaping Replacement HVAC Coil Lead Times
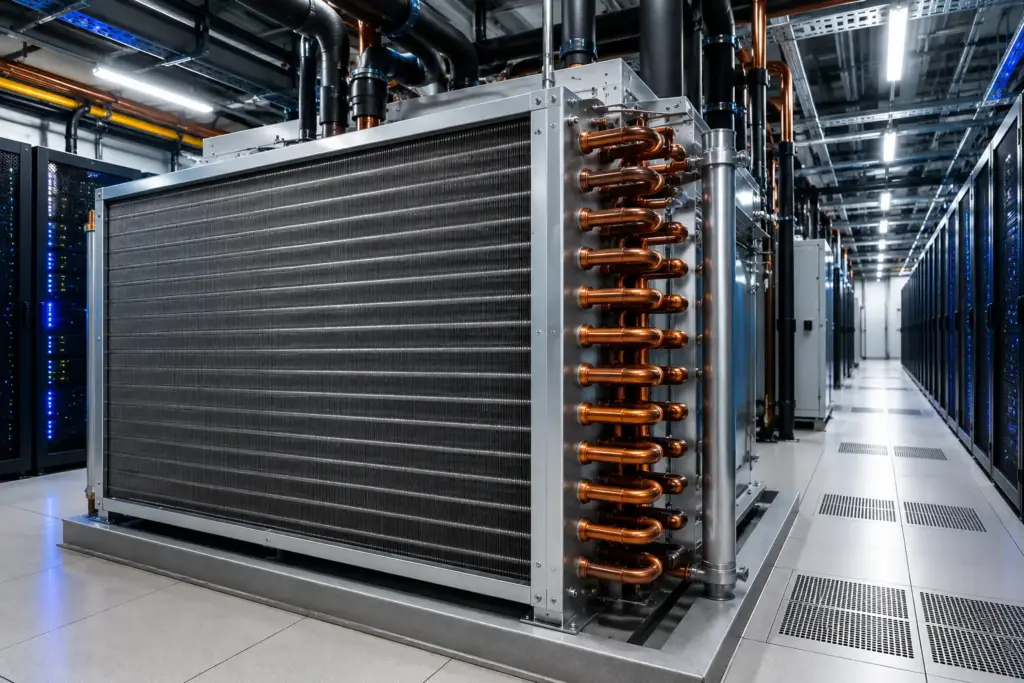
Data Centers Are Reshaping the HVAC Supply Chain

If you’ve recently tried to purchase a replacement HVAC coils, you’ve likely noticed longer lead times, fewer quick-ship options, and rising costs. The primary reason? The explosive growth of data centers.

Driven by cloud computing, AI, and digital infrastructure expansion, data centers are consuming massive amounts of HVAC equipment and cooling components. As manufacturers dedicate more production capacity to these large-scale projects, replacement coil availability for commercial, industrial, healthcare, education, and institutional facilities is becoming increasingly constrained.replacement HVAC coil lead times

Why Lead Times Are Increasing

Historically, replacement HVAC coils could often be delivered within a few weeks. Today, lead times have expanded significantly due to a combination of factors:

  • Record demand from data center construction
  • Increased consumption of copper, aluminum, and steel
  • Manufacturing labor shortages
  • Limited production capacity
  • Ongoing supply chain and freight challenges

As a result, many replacement coil orders now require substantially longer planning horizons than they did just a few years ago.

The Data Center Effect

Modern data centers operate around the clock and generate enormous amounts of heat. To maintain uptime, these facilities require extensive cooling infrastructure, including coils, air handlers, condensers, heat exchangers, and specialized cooling systems.

The rise of AI has accelerated this demand even further. New hyperscale data centers are being built at unprecedented rates, consuming manufacturing resources that were once readily available to the broader HVAC market.

When manufacturers commit production lines to large data center projects, fewer resources remain available for replacement coil production.

Why Quick-Ship Programs Are Struggling

Quick-ship programs have traditionally helped contractors respond to emergency coil failures. However, these programs depend on available manufacturing capacity and stocked materials.

Today, many manufacturers are facing:

  • Fully booked production schedules
  • Reduced raw material inventories
  • Labor constraints
  • Transportation bottlenecks

As a result, quick-ship options still exist but are often more limited and less predictable than in the past.

What Building Owners and Contractors Can Do

To minimize risk and avoid unexpected downtime:

  • Plan replacements before failure occurs
  • Monitor lead times regularly
  • Work with experienced replacement coil specialists
  • Discuss expedited options early in the project cycle
  • Maintain strong supplier relationships
  •  

The Bottom Line

The rapid growth of data centers—and the AI boom fueling them—is fundamentally changing the HVAC industry. Longer replacement coil lead times and reduced quick-ship availability are becoming the new normal as manufacturers prioritize large-scale cooling infrastructure projects.

Organizations that plan ahead and partner with reliable suppliers will be best positioned to navigate these evolving market conditions and keep critical HVAC systems operating efficiently.

RELATED POSTS

Why Cooling Coils Need to Be Replaced

Top 10 Chilled Water Coil Facts

OEM Replacement Coils: Repair or Replace


How Should Steam Coils Be Designed??

Steam coils

Of all of  the various types of coils, steam coils operate in the most complicated ways. They are, in effect, a product of the system and controls around the coil. If not installed correctly, steam coils simply won’t work properly.

Overview:

The object of any steam coil is to have steam enter the coil as steam and exit as condensate. In a perfect scenario, the BTU load on the coil turns steam into condensate just before it’s ready to exit the coil. Under real world conditions however, condensate usually begins to form inside the tubes almost immediately. Especially when dealing with low-pressure systems, you have to find a way to evacuate the condensate from the steam coil.

Coil Pitch

A good coil manufacturer will internally pitch the steam coil within the coil casing to force the condensate toward the outlet connection. This pitch is usually 1/8 “ per lineal foot of coil.

Coil Length

If you require steam to travel 144” and make multiple passes through the coil, then, simply put, your system will not work properly. Condensate forms too early, and it cannot escape the coil. Because of this, coils cannot be too long. A better strategy is to break one long coil into two smaller coils side by side, while feeding from both sides.

Tube Diameter:

Steam Distributing coils often have to be 1  1/8 ” diameter tubes. If the BTU load on a coil is really large, then as a result, you will generate many more Lbs./hour of condensate. If the tube diameter is too small, then the condensate, which needs to evacuate, has no place to go.

Traps:

Traps are required on steam coil systems. The traps should be “float & thermostatic” type traps and be located 18 “ below the condensate connection on the steam coil. Without this, the condensate just sits in the system without any place to go.

Vacuum Breakers

Vacuum Breakers are often installed in coil systems to remove any excess condensate that may remain within the coil.

Insulated Piping:

There is no such thing as a “Condensate” Heating coil, built as a steam coil. IT DOESN’T WORK.  However, and this happens an astounding amount of times, due to the long distances the steam has to travel from the boiler to the coil, many times, the steam will enter the coil as condensate due to the piping not being insulated.

Anything that makes condensate lay in a coil is harmful to both the steam coil and the system. You will get a “water hammer” when the system is turned on and the incoming steam just blasts against the condensate. Worse than the loud and annoying sound that produces is the fact that it just destroys the steam coil. The brazing was never designed for “water hammer”.  Also, the coils do not heat properly. Have you ever seen a long coil and run your hand down its length only to feel that the entering steam end of the coil is hot but the far end is cold? More times than not, this means that condensate is laying in the coil and not allowing the steam to properly travel the length of the coil.

Steam Coils require a real expertise to design & build. We at Capital Coil have a long history in solving coil problems and building steam coils so that they work correctly the first time. Give us a call for your next job – you’ll be pleasantly surprised!

RELATED POSTS

Different Types of Steam Coils?

Frozen Steam Coils: How Do You Prevent This?

Steam Distributing (Non-Freeze) Coils: The Accidental Coils


Condenser Coil Failing? Here’s Why

Did you turn on your DX system only to find the condenser coil isn’t working? It may seem like a simple fix—but it often isn’t. If you can provide the unit’s model number, there’s a good chance we’ve already built a replacement. If not, you typically face two choices: wait months and pay a huge premium through the OEM, or call Capital Coil for a faster, engineered solution tailored to your system.

Condenser Coils

Condenser coils rarely freeze, so the first step is identifying the cause of failure—corrosion, age, or vibration.Condenser Coil

Old age is the easiest to address. With a few basic dimensions—coil size, number of rows, and fins per inch—we can quickly quote a duplicate. Since condenser coils are usually outdoors, they’re easy to measure and photograph. Images of headers and return bends also help us understand circuiting and sub-cooling requirements.

Corrosion often points to poor original design. Coastal or high-salt environments can degrade aluminum fins within a year or two. To prevent this, you can upgrade to copper fins with stainless steel casings for maximum durability, or opt for protective coatings—a more cost-effective solution that typically adds just 1–2 weeks to lead time.

Vibration is another common issue, especially when coils are near moving equipment. Leaks near the tube sheet—often appearing as if the tube is being sliced—are a key indicator. Proper isolation is critical, and in some cases, oversizing tube sheet holes can help reduce stress, though not all manufacturers offer this option.

Maintenance is equally important. Because condenser coils are exposed to outdoor air, they accumulate debris quickly. With tight fin spacing (12–20 fins per inch), coils can act like filters, reducing efficiency when clogged. Regular cleaning is essential, and many customers now request thicker fins to better withstand high-pressure washing and harsh cleaning agents.

When choosing an HVAC coil manufacturer, work with a partner who guides you through the engineering process. Capital Coil & Air brings over a decade of experience, ensuring a smooth process from quote to installation. Call and speak with a coil specialist today!

RELATED POSTS

Boca Raton Hospital Covid-19 Care Condenser Coils

Custom Condenser Coils

Top 5 Reasons Commercial HVAC Coils Prematurely Fail

Replacing Carrier Chilled Water Coils

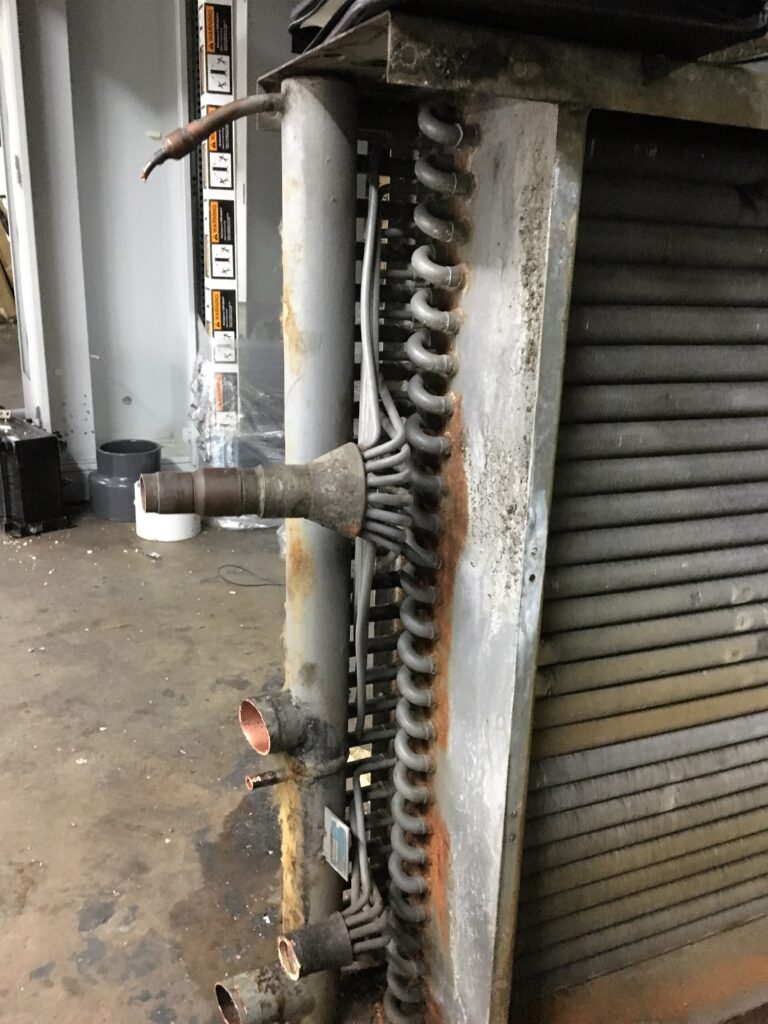
For HVAC professionals, replacing Carrier chilled water coils is a task that demands precision. One miscalculation in dimensions, connection types, or circuit configurations can turn a straightforward replacement into a significant challenge, leading to delays and complications like compromised airflow or customer callbacks.

Why Precision Is Critical

Carrier chilled water coils are engineered with extremely precise specifications. Even the slightest deviation can result in issues such as:

  • Airflow Restrictions: A poor fit can obstruct air movement, affecting system efficiency.
  • Inefficient Heat Transfer: Suboptimal coils may lead to inadequate cooling performance and increased energy costs.
  • Connection Misalignment: Mismatched connections complicate the installation process and can lead to leaks or failures.
  • Extended Installation Times: Inaccuracies often necessitate additional rework, wasting valuable time on the job site.

It’s crucial to explain the importance of attention to detail to your clients. A so-called “replacement” coil that doesn’t meet specifications can inadvertently introduce new problems rather than solving the existing ones.

The Capital Coil Advantage

In the world of HVAC, many coil manufacturers overlook the significance of these specifications, opting for oversimplified solutions that can create headaches later on.

Here’s where Capital Coil steps in. Whether you have:chilled water coil

  • A clear model tag
  • A partial number
  • Or even just a worn-out coil

We have the expertise to provide a reliable solution. Our team has extensive experience manufacturing the coil types you depend on daily, ensuring you receive high-quality products.

Cross-Referencing Capabilities

In many cases, we can cross-reference Carrier coil models accurately, thanks to our comprehensive manufacturing history. If direct cross-referencing isn’t feasible, we can also work from the drawings you provide, creating a custom solution that meets your precise requirements.

Take-aways 

Replacing a Carrier chilled water coil doesn’t have to be a gamble. By collaborating with Capital Coil, you gain a reliable partner who understands the critical elements of the job: ensuring a perfect fit, optimizing performance, and getting the installation right the first time. 

For additional information or to discuss your specific coil replacement needs, feel free to reach out to the Capital Coil team. Let us help you streamline your projects and enhance your HVAC services!

RELATED POSTS

Looking For A Trane Replacement Coil

Top 10 Chilled Water Coil Facts

Why Cooling Coils Need to Be Replaced


Looking For A Trane Replacement Coil

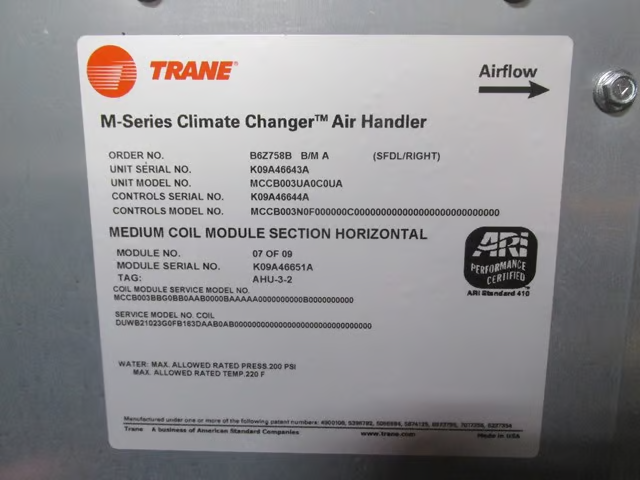
If you need Trane replacement coil within a Trane system, but aren’t sure about the dimensions or decoding the model #, send this to Capital Coil & Air for pricing. On most Trane AHU’s, the AHU model #, as well as the coil or “part #”, is listed as “Service Model No Coil”. If you see this, send it over, and the sales team at Capital Coil will handle the rest. Great pricing with the ability to be built as fast as is needed!Trane replacement coil


Steam Distributing Coils (Non-Freeze)

Steam Distributing CoilsWere you aware that Steam Distributing coils or “Non-Freeze” steam coils were essentially discovered by accident? First, it must be mentioned that there is no such thing as a 100% “Non-Freeze” steam coil because under the right conditions, any coil can freeze. As such, Capital Coil tries to steer clear of the term “Non-Freeze” because it is a mischaracterization. Steam Distributing Coils is the correct terminology that Capital Coil uses when speaking about steam coils that see entering air temperatures under 32* F. Trapped condensate in the tubes and/or headers, coupled with entering air temperatures below 32*F over the face of the coil, creates a situation with a near-100% certainty that your steam coil will freeze. Because of this, there is no magical solution to fully eliminate freezing your coil, which again is why Capital Coil does not use the term “Non-Freeze”.

Steam turns to condensate little by little as it travels through the coil. Lower pressure steam turns to condensate faster than higher pressure steam!! The longer the tube length in the coil, the earlier the condensate is formed, and the longer it has to travel through the tubes. One very important fact to always remember is that too much condensate in a steam coil IS NEVER A GOOD THING…under any circumstances! Because of this requirement, everything is designed to ensure the removal of all condensate from the coil. Systems are heavily designed with float & thermostatic traps, vacuum breakers, and placement of piping to help get rid of any remaining condensate.

Another headache that occurs when condensate freezes is that it creates a “water-hammer”. A “water-hammer” can best be described as a loud banging noise as the steam is coming into contact with the condensate in the coil. It does not allow the steam to be evenly distributed across the face of the coil…again not a good thing!

At the inception of the HVAC industry, steam coils were originally designed to be shorter in length because there was not a good way to evacuate condensate. In an effort to make steam coils longer in length, the concept of a steam coil containing a tube within a tube was invented. The steam feeds only the inner tubes, which travels the entire of the length of the outer-tube. Holes are placed every 12” with the inner tube releasing condensate to the outer-tube. The idea is that the condensate is slowly and evenly “distributed” across the entire length of the coil. Heating is also evenly applied across the coil’s face, and if the casing is pitched at a downward angle, condensate cannot remain trapped. It was later discovered as an added bonus that under most circumstances these coils will not freeze. So while the concept was never designed or intended to become known as “Non-Freeze”, they are now used in almost all projects dealing with air temperatures below 32*F. Please keep in mind that you will still need all of the other steam protective devices in the system, including the freeze-stat, but all in all, it is much more difficult to freeze coils today than it was 30-40 years ago. Necessity may be “the mother of invention” but this great concept was discovered accidently.

Capital Coil is available for all of your coil-related trivia needs, so please don’t hesitate to reach out whenever we can be of assistance.

RELATED POSTS

Different Types of Steam Coils?

Frozen Steam Coils: How Do You Prevent This?

Commercial Steam Coils: Lengths & Controls

Steam Distributing Coils


Top 5 Reasons Commercial HVAC Coils Prematurely Fail

Capital Coil & Air has come across virtually every scenario over the years in which a commercial HVAC coil had to be prematurely replaced, and we have since created an easy guide targeting the main reasons HVAC Coils prematurely fail.

  • Coil Plugging: If you are not changing filters and/or your commercial HVAC coils are not properly cleaned in a timely manner, your coil will actually begin to act as a filter. When dirt builds up on the coil, that blockage prevents heat transfer and can cause an approximate 20% to 40% drop in performance. Dirt adds to the coil resistance and can be a primary cause for your coil to fail prematurely.
  • Vibration: When your HVAC coils are installed near a moving piece of equipment, vibration can occur and cause leaks. You can tell if vibration is the main cause if leaks are near the tube sheet and look like they are slicing through the tube. If/when that happens, the coils should be isolated from the rest of the system to prevent vibration from causing damage. One way to combat this is by oversizing the tubesheet holes, but many manufacturers will not do this. Condenser Coils are usually the most common victims of vibration.
  • Corrosive Environment: This applies to both the air in the environment and inside the tubes. For instance, if there is a corrosive element in the air, it will eat away at the copper tubes; whether you have 0.020” wall or 0.049” wall. This is very common in coastal areas where there may be salt in the air. To keep the costs down from going to a stainless steel or cupro-nickel coil, we usually suggest coating the HVAC coils. Coatings are almost always within your budget, and its application will only add about a week to the overall lead time. Steam condensate and untreated water can cause corrosion within the tubes of HVAC coils as well. If you have a steam coil that has failed before the one year warranty, there’s a great chance that corrosive agents are in the steam, and it’s eating away at the copper tubes.
  • Freeze-Ups: Most people think that when HVAC coils freeze, the water or condensate laying in the coil freezes into ice and it expands causing the tubes to bulge and eventually spring leaks. What really happens is that the coil will freeze in multiple areas simultaneously, and it’s the pressure between these areas that cause the tubes to swell and eventually burst. These are very easy to spot as the leaks will run the length of the tube rather than around the tube.  ALSO be very careful when considering “freeze-proof” coils!  If you remove 5-6 inches from the fin length to make the “freeze-proof” application fit, your coil’s performance will suffer considerably. 
  • System Design: You would be amazed to learn how many HVAC coils were never designed properly for their systems. If there is a design problem, replacing the coil will only waste time and money; while you have done nothing other than duplicate the previous problem. A little known fact in the replacement market is that a high percentage of all our projects are because the coils were built incorrectly or were never designed correctly in the first place. In some cases, owners attempt to improve the coil’s performance by adding additional rows. Most however do this without taking into account the air pressure drop or fluid pressure drop that comes with it.

When dealing with an HVAC coil manufacturer, try to partner up with one who will walk you through the engineering and explain it along the way. Capital Coil & Air has well over a decade of experience and can help you diagnose whatever problem that you are experiencing correctly the first time. We look forward to working with you on your next project!

RELATED POSTS

Four Things That You Need When Buying Replacement Coils

Replacement HVAC Coils: 10 Common Ordering Mistakes

Coil Costs: What Will Make Your HVAC Coils More Expensive?


Different Types of Steam Coils

There are two types of steam coils:  standard steam coils, which are used in most reheat applications, and steam distributing coils, which are used in applications where the entering air temperature is below 40 F degrees.  Many times, this type of coil is also known as a “non-freeze” coil, but that name is misleading because in reality, there is no such thing as “non-freeze”. 

Standard Steam

Standard steam coils operate a lot like hot water coils, but the construction is very different even if the coils appear to be constructed the same.  The supply and return connections are often on the same end like a hot water coil.  But, steam is very different than hot water, and the coil must be built for and circuited for steam.  Keep in mind that steam is always more erosive than hot water.  The brazing and tube wall thickness must account for steam. ALWAYS remember that even low pressure steam is more erosive than hot water, and a steam coil needs to be built accordingly.

Steam Distributing (Non-Freeze)

Steam distributing coils are a completely different type of coil because they are constructed as a tube within a tube. Every place that you see an outside tube or header, there is an inside tube and header that you can’t see. The steam on the inner tube keeps the condensate in the outer tube from freezing.  The purpose of the Steam Coiloriginal coil design was to distribute the steam evenly along the length of the coil and to eliminate any dead spots on the coil.  A byproduct of this coil was also found.  The coils didn’t freeze nearly as easily as the standard steam coil, so the coils became known as “non-freeze”, which as mentioned, is not completely accurate.  Any coil can freeze under the right conditions, but, this design is what needs to be used when the entering air is under 40F degrees!!! 

Steam Coil Design

Steam coil designs can be very tricky.  Steam coils are totally a function of the system and installation, while other coils operate more independently of the system.  There needs to be correctly designed traps, and they need to be installed in the correct place and depth in the system.  Often, vacuum breakers are also needed in the system.  The piping must also be installed correctly to make sure the steam is entering the coil and not the condensate.  Even with all of those factors, you’ll need a correctly designed steam coil that matches the steam pressure, length of the coil, and the entering air temperature.  Coils can freeze easily.  Coils can be too long in length and the steam cannot travel the length of the coil and distribute evenly.  Condensate can easily be trapped somewhere in the coil, and the result is water hammer. 

Capital Coil & Air has years of experience designing steam coils, and is here to answer any questions and help to design the right coil for your project! 

Related Topics

Frozen Steam Coils: How to Prevent it!

Commercial Steam Coils; Lengths & Controls

HEATING SEASON WILL SOON BE UPON US